How to adjust the medium format film size setting in Epson Scan so the image is not cropped
Applies To
- Operating Systems: Windows, macOS
- Software: EPSON Scan, Epson Scan 2
- Hardware: Scanners that support film scanning
-
Related Articles:
- KA-01633 - Newton rings when scanning film.
Description
When scanning medium format film ("brownies"), selecting the correct format size in Thumbnail preview mode ensures Epson Scan detects the correct scan area — otherwise, images may be cropped to a smaller area than intended.
- Normal preview: shows the full previewed image; you select the scan area and adjust quality manually.
- Thumbnail preview: Epson Scan automatically locates the edges of the scan area and applies automatic exposure. This is the default preview type for film or slides.
Solution
EPSON Scan
-
Open EPSON Scan in Home or Professional Mode.
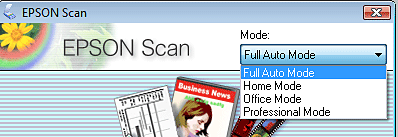
Note: You can't use Full Auto Mode to scan medium format film.
-
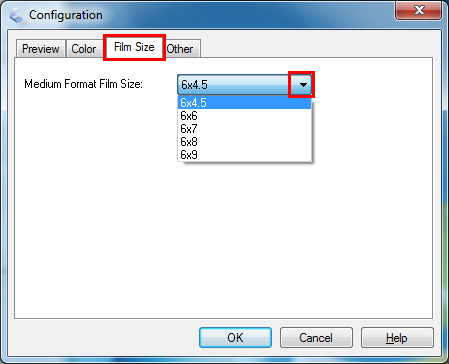
Click Configuration, click the Film Size tab, and select the correct size as the Medium Format Film Size setting.
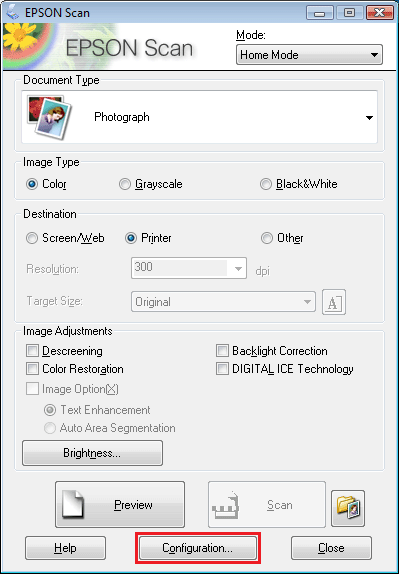
Available sizes (inches): 6x4.5, 6x6, 6x7, 6x8, 6x9.
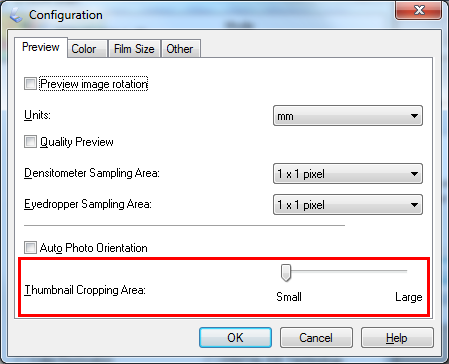
If needed, adjust the amount of clipping in Thumbnail mode via the Preview tab in the Configuration window.
-
Select your document type:
- Home mode: open the Document Type list and select Color Negative Film, B&W Negative Film, or Positive Film (for a film strip), or Positive Film (for slides). Then select Color, Grayscale, or Black&White as needed.
- Professional mode: select Film (with Film Holder) as Document Type, then select the appropriate Film Type from the same options.
- Select the resolution and destination as needed, then click Preview.
-
Epson Scan displays the preview in a separate window, with an automatically-created marquee (a moving dotted line marking the scan area) around each image in Thumbnail mode. Only the area within the marquee is captured when you scan.
To adjust a marquee: click inside it, click the delete marquee icon, then switch to Normal preview mode and preview again to select the area manually.
- Click Scan to save the image(s).
Epson Scan 2
-
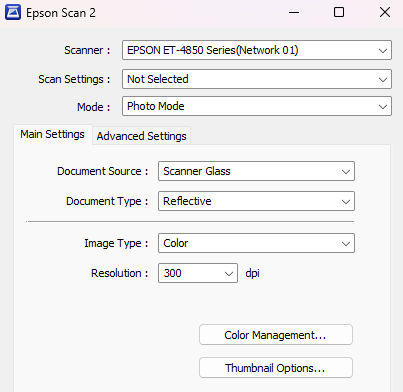
Open Epson Scan 2 and select Photo Mode.
-
Select Transparency Unit as the Document Source and choose the appropriate Document Type.

-
Click Thumbnail Options and select the correct size from the Medium Format Film Size list.

If needed, adjust the amount of clipping via the Cropped Area Size setting.
-
Epson Scan 2 shows the preview beside the settings screen — select the Thumbnail option at the top of the preview to enable automatic marquees.

To adjust a marquee: click inside it, click the delete marquee icon, then untick Thumbnails and preview again to select the area manually.
- Click Scan to save the image(s).
